Table of Contents
If you’ve got a hankering to make your backyard a bit less vanilla and a smidge more Van Gogh, then creating a rock garden is like having a handful of magic beans to trade for a cow. But instead of a big stinkin’ beanstalk, you get a patch of land that’s a surefire compliment magnet. Imagine the aroma of blooming flowers intermingling with the distinct scent of mother nature in its rocky glory. It may sound like a daunting task but hold on to your wheelbarrows, this guide will arm you with a load of tips and tricks to transform your backyard with the calming atmosphere that zen gardens bring.
Understanding the Basics of Rock Gardens
You’re probably thinking this is gonna be about lugging around a bunch of rocks and breaking your back. But hold your horses, it’s much more than that! Making a rock garden is a labor of love and creativity. It involves strategically arranging landscaping rocks along with your selection of plants in an area that optimally sees both sun and shade. It’s like playing chess with nature.
Every rock garden starts with a game plan. Picture the finished product in your mind and then back up to start. Important factors to consider include the size, the location, the type of rocks, and the variety of flora to best complement the layout. One man’s rock garden might be another man’s pile of rocks, so make sure your vision is clear.
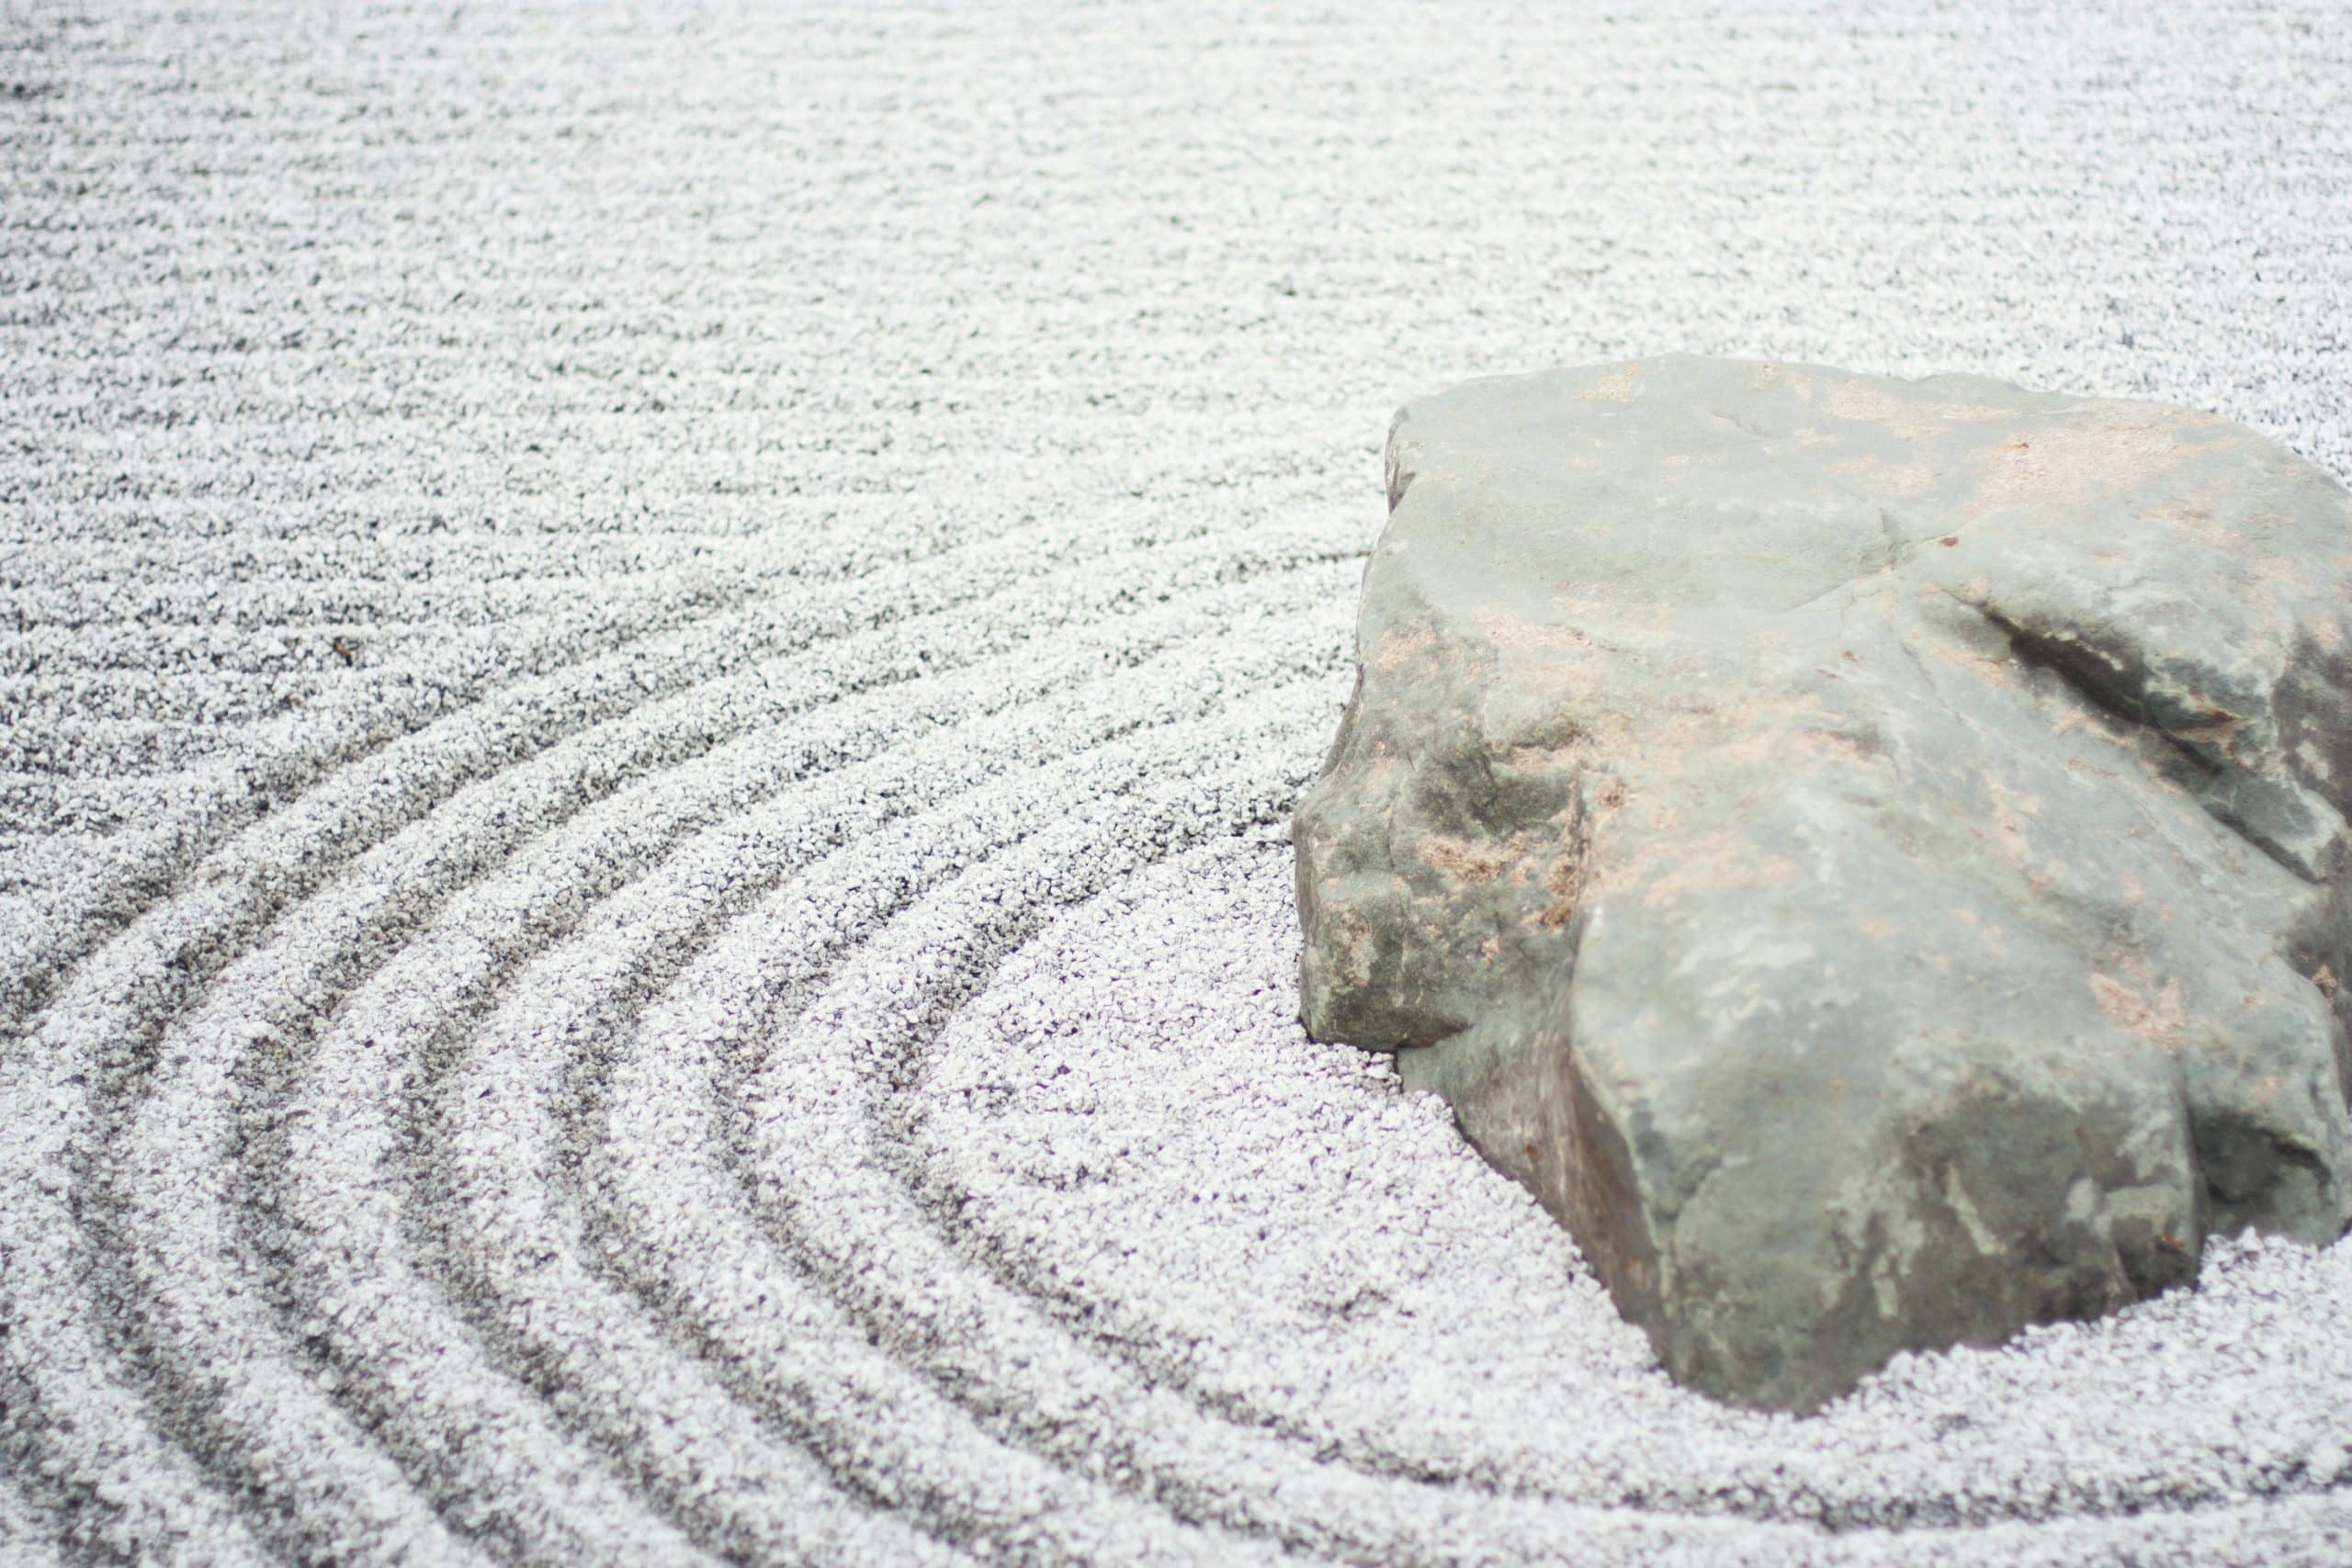
What Is a Rock Garden and Why Build One
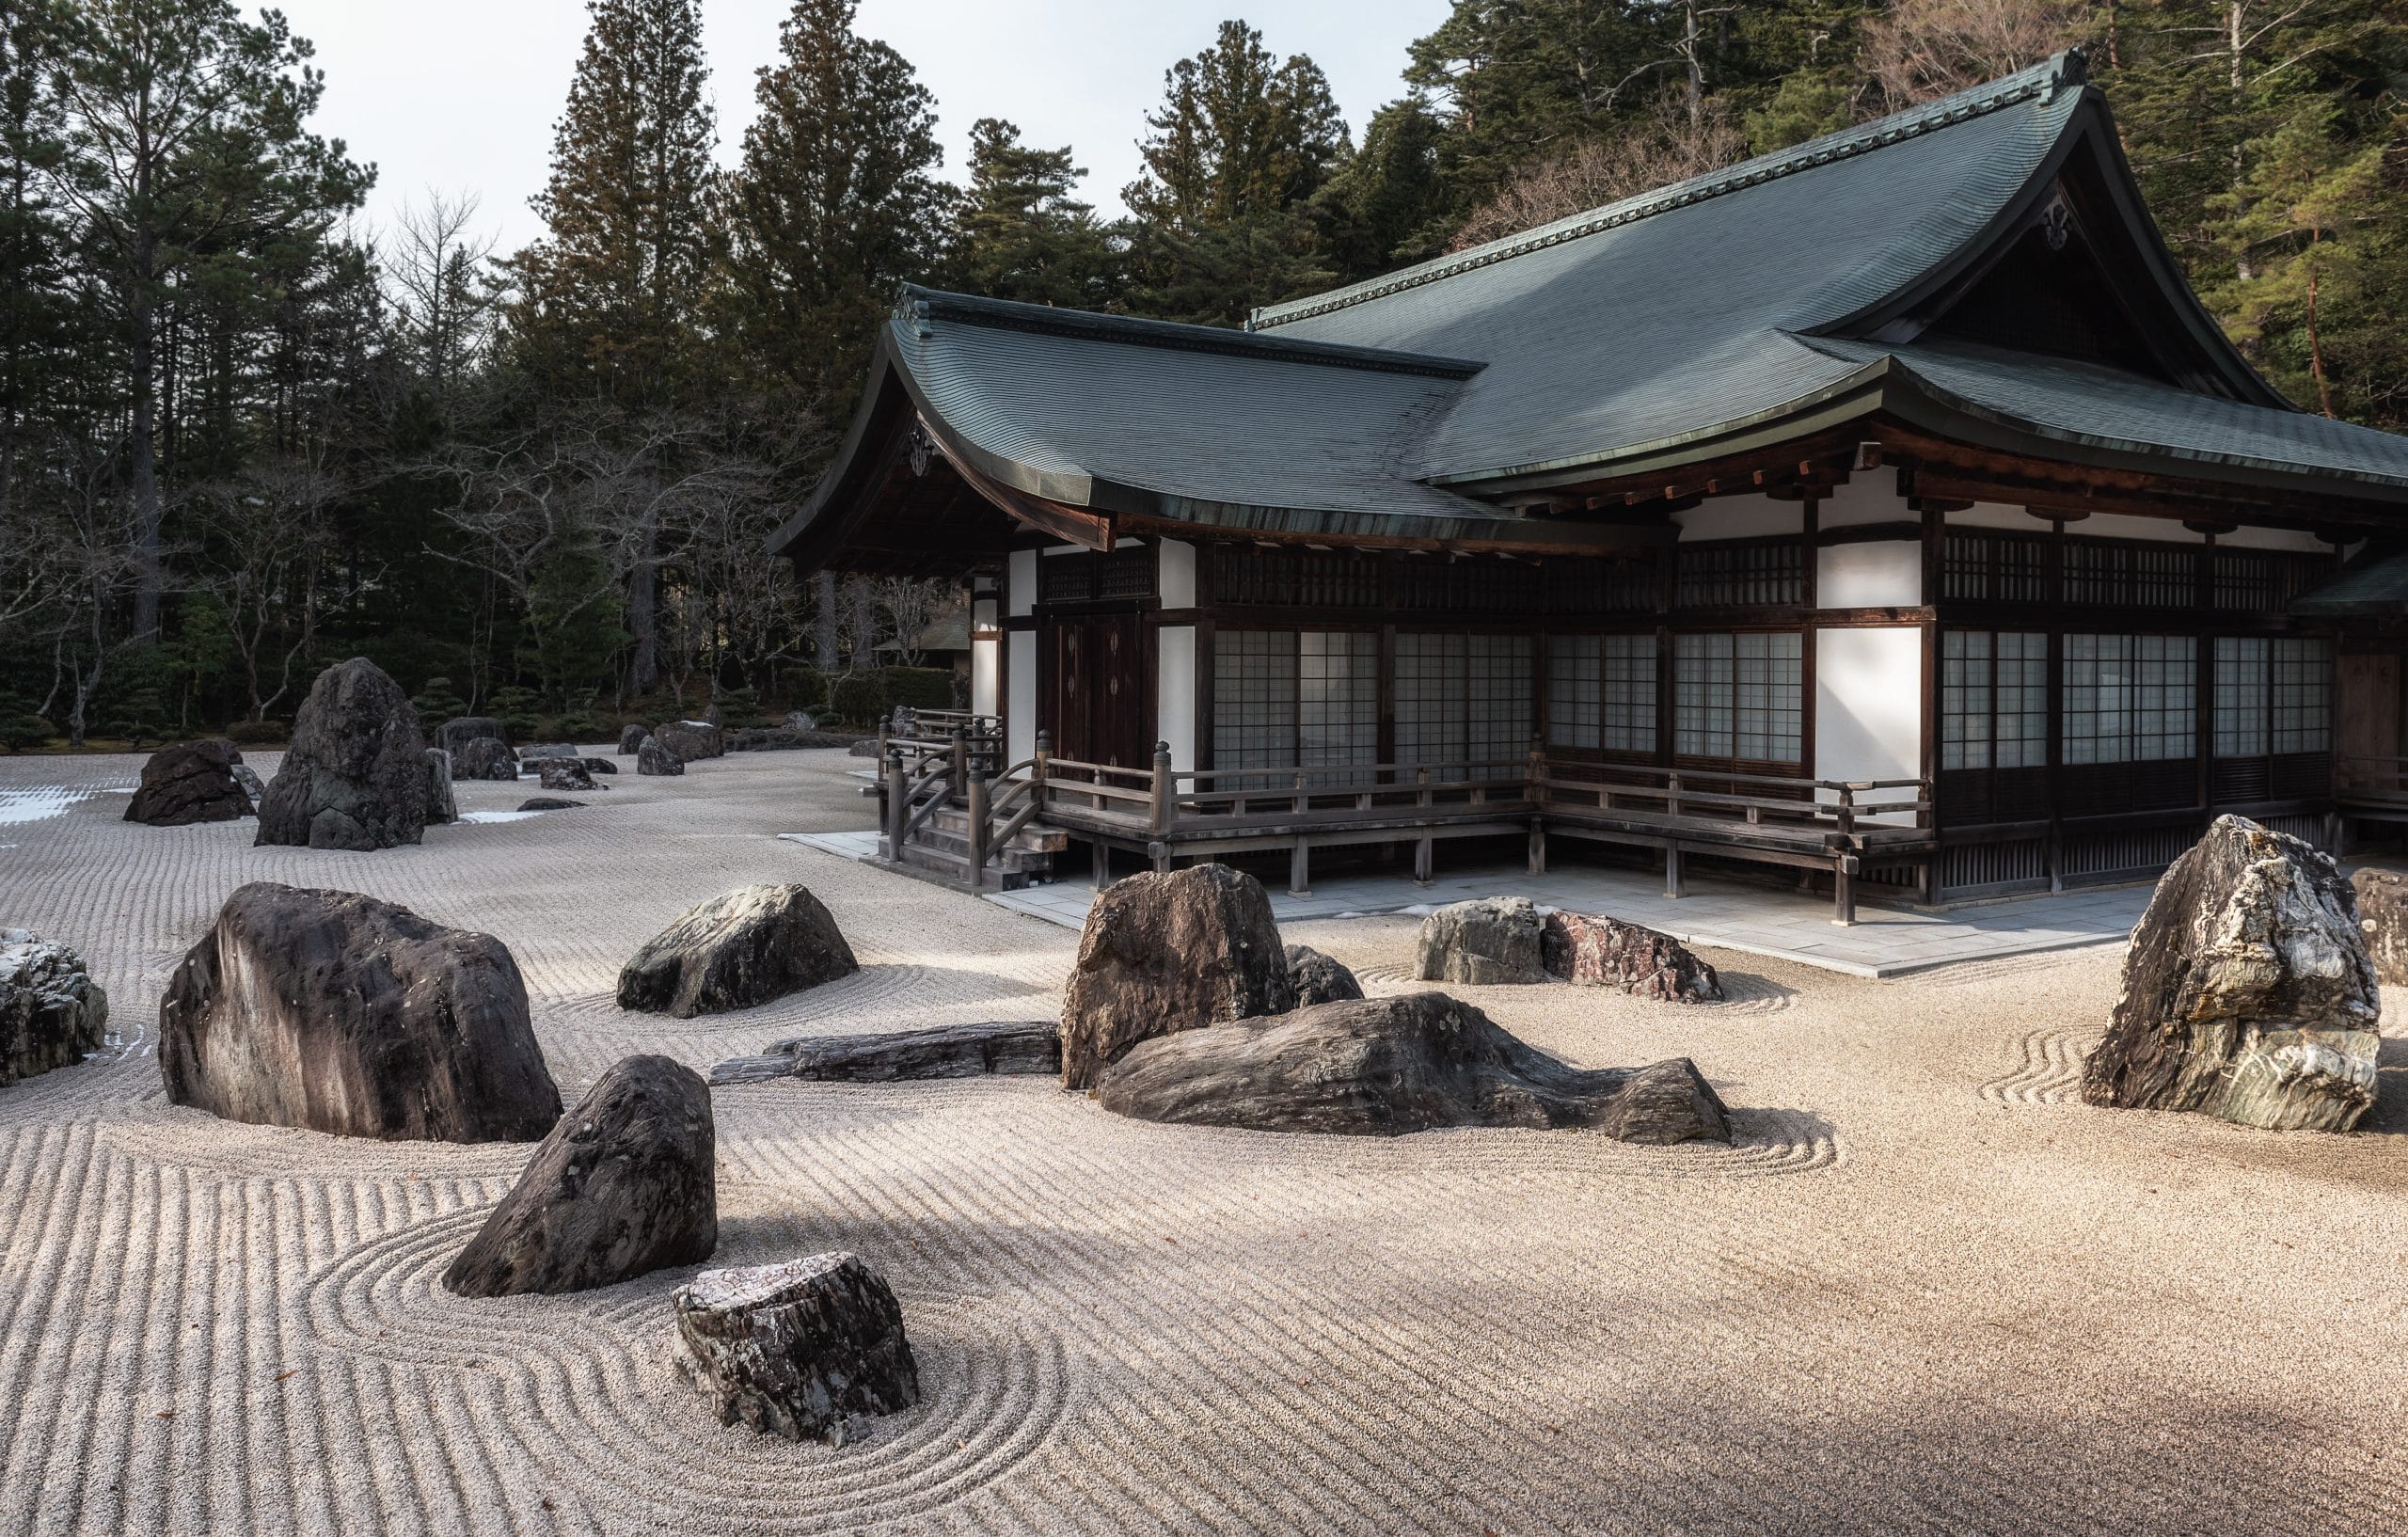
Now let’s take a sec to give the rock garden its due justice. In essence, a rock garden isn’t just about haphazardly tossing stones hither and thither. Instead, it contains carefully organized, smooth stepping stones, rocks, and boulders amongst a variety of plants and flowers.
Erecting a rock garden gives you a low-maintenance and unique landscape that rolls with the punches of the seasons. It not only multiplies the beauty quotient of your backyard but also allows you to get your hands dirty and connect with mother earth. A science experiment in your backyard, if you will, without the mice and the Bunsen burner!
Getting Inspired: Rock Garden Ideas
Nudging the creative part of your brain for rock garden inspiration ain’t as hard as trying to get ketchup out of a bottle. Whether you want to create a wildlife-friendly sanctuary or imitate the tranquility of zen gardens, the opportunities are endless. It’s like making your backyard perform an engaging one-man play with only nature as the audience.
Wildlife-Friendly Rock Gardens
A wildlife-friendly rock garden can be your little oasis of biodiversity in suburbia or downtown. Remaking your backyard into a haven for chirping birds and buzzing bees is a chance to give back to nature. From providing a sanctuary for butterflies to creating hideouts for beetles, your rock garden could potentially turn into the United Nations of bug conferences.
Calming Water Features in Rock Gardens
Add some splash to your rock garden by introducing a water feature or two. The murmur of flowing water superimposed with the wiry rustle of stones and rocks on a mild slope brings nature right into your backyard like FedEx delivering packages. Create your very own secret oasis, without having to resort to a genie in a lamp!
Color Schemes for Rock Gardens
When it comes to color schemes for rock gardens, it ain’t all just grey and green in that jungle. Imagine your garden is a canvas and your rocks, pebbles and plants are the spectrum of hues at your disposal. The color of your rocks could contrast with the plants for your rock garden or blend harmoniously. You’ve got some options here. Cast your peepers on some snow white pebbles contrasted with dark lava rocks, or maybe some granite slabs nestled among purple loosestrife. You want your rock garden to whistle while it works, so experiment, mix it up, and find the combination that takes your breath away.
DIY Rock Garden: A Step-By-Step Guide
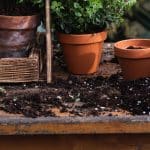
So you want to build a rock garden, eh? That’s perfect. Let me break this down without breaking your back. It all kicks off with finding a nice patch of earth. We’ll then add some items from your shopping list – pea gravel, river rocks, crushed granite, whatever floats your boat. A layer of topsoil would serve as the butter to this bread. We’re also gonna dig holes and bury any rocks. Sounds strange, I know, but it gives a natural look. To keep things tidy, we’ll add organic mulch, shredded bark or wood chips. But rock gardens prefer LBDs (little black dresses), so stone mulches are a hit. The masterpiece is wrapped in landscaping fabric. Now you’re thinking, what about the plants? Well, they should love well-draining soil like coffee aficionados love their morning cup of joe. And voila, a DIY rock garden is ready to steal the show!
1. Find the Perfect Location for Your Rock Garden
Finding a spot for your rock garden is sort of like picking a seat at the cinema. You don’t want to be too close to the screen or, in this case, your house. Also, avoid areas with huge trees where you’d have to dig up the grass and fight with roots. The perfect spot would be where the sun shines, the rain dances and the birds sing. The weather elements won’t wear you out, and it’s much easier to cultivate plants and blossoms. Remember, we want a picturesque rock garden, not an impenetrable fortress.
2. Planning the Design of Your Rock Garden
It’s design time, boys and girls! Put your hard hats on. We’ve got soil, rocks, plants and a blank canvas for your imagination. Think flower beds, landscape designer, and rocks and plants living together. Time and patience make a sprawling rock garden for all to enjoy. Balance is key, both size and aesthetics. Spice up your rock gardening with a selection of plants, adding pops of color and playful shadows. Raised rock gardens can add a nice contour to any garden beds. Lastly, the natural landscape of rocks and soil should bring out the best in each other like bacon and eggs.
Decide on Size and Shape
Sorting out the size and shape of your rock garden is as simple as using a garden hose. Think of it like a flexible pencil, sketching your dream garden right there in the lawn. It’s as flexible as a gymnast and as useful as a Swiss army knife.
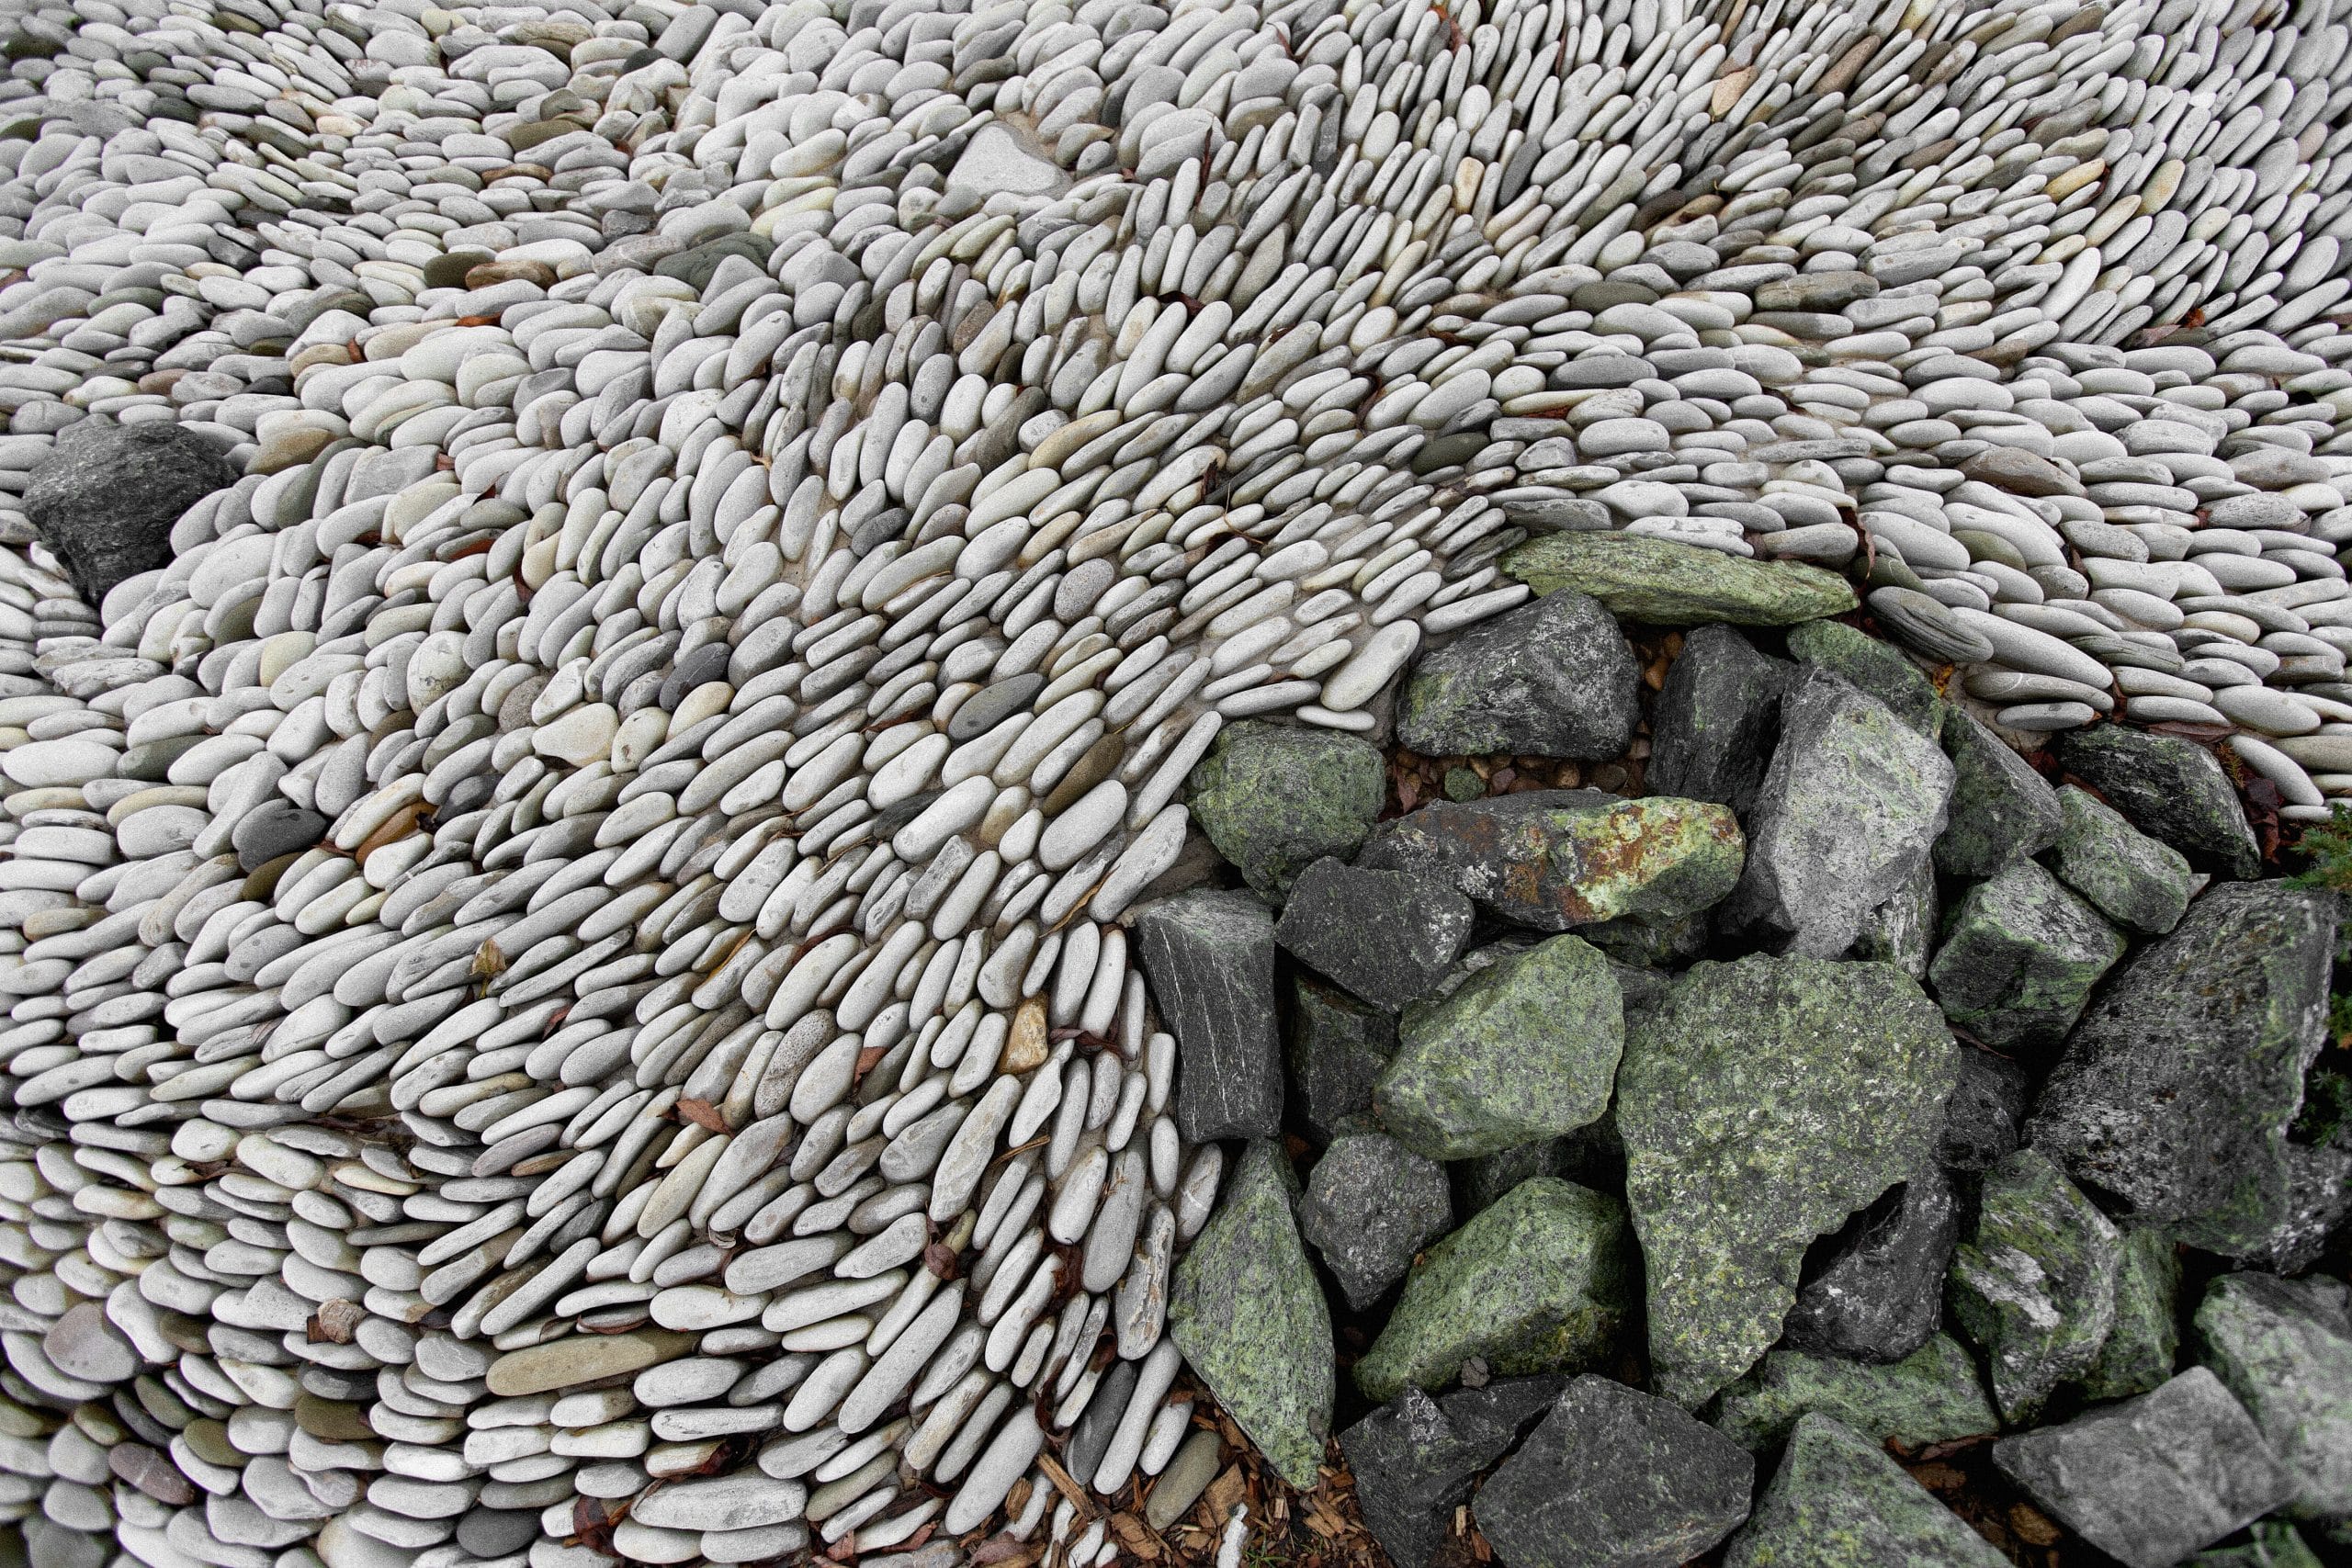
Selection of Rocks and Boulders
Looking for rocks? You could be in for quite the scavenger hunt. Garden centers are like candy stores for rock collectors, and you might just stumble upon that unique rock to make your garden pop. Remember, beauty is in the eye of the rock holder.
Consider the Organizational Layout
Organizing your rock garden layout isn’t rocket science. It’s all about creating an appealing blend where each element has its rightful place. Large rocks here, smaller ones there, and maybe a patch of bright flora in that corner? All you need is a bit of imagination and you’re set to go.
3. Gathering the Necessary Materials
Dig out your shopping list, folks. Your rock garden ideas are taking off now. We need plenty of drainage, don’t forget. Rocks aside, we’ll need landscaping ideas, and not just the kind in your head. Run some soil tests so we know the ground we’re working with. We can then add sand or compost to make can make it cozy for the plants. The satisfaction of a job well done will be worth every minute in planning.
List of Essential Tools
A spade, a rake and a wheelbarrow walk into a bar, said no one. They’re all at your service, ready to help build your rock garden. Don’t forget the gloves; those rocks can be tough customers.
Choosing the Right Type of Soil
Don’t underestimate the role of soil in Japanese rock gardens. It needs to be nourishing, supportive, and just right to cradle your chosen rocks. And if you want to add a koi pond, make sure to plant some drought-resistant plants nearby to keep things well-balanced.
Selecting Suitable Plants for a Rock Garden
Now, when it comes to selecting suitable plants for a rock garden, it’s like picking a dance partner at a ball. Make sure they’re adjusted to the climate, hardy and good to look at. We ain’t growing potatoes here!
4. Preparing Your Area and Removing the Grass
Before you turn loose of all those lovely rocks and boulders, you need to prep that land. Embrace the lasagna method, or sheet mulching as it’s often called. Grass and weeds might act like uninvited guests at your garden party if you don’t go this route and we don’t want that. After taming the grass, throw on some compost or manure, an old newspaper can work if you’re in a pinch, finish that layer with some nicest bark or straw. Voila! You have yourself a fancy lasagna all ready for your rocks.
5. Start Building: Laying Your First Layer of Rocks
Now, grab your crew of big, irregular rocks, and let’s join forces to lay the first layer. It’s like putting a pattern on a sweater, start at the base, working your way up. Give it a natural appeal, maybe add some nice, smooth pebbles in there. There’s no time for wobbly, unstable rocks here! It’s a game of stacking stones here, friend – make it sturdy. And, hey, remember to leave a luxury suite-sized spot free for your plants.
6. Adding Soil and Landscaping Fabric
Okay, now it’s time to treat those rocks to a bed with soil. It’s like tucking ’em in for the night. Throw on some good garden soil to pack around and between the rocks. Add some extra cushion with a layer of landscape fabric, it’ll give your plants a comfy place to rest their roots and help keep the weeds at bay. It’s like the ultimate rock five-star, garden-style hotel. Welcome to the rocks’ suite life!
7. Building with Smaller Rocks: The Second Layer
Entering round two here, folks! Now we’re dealing with the finesse of smaller rocks. Think of it as creating a raised rock garden bed, a little elevated stage for your favorite rocks to shine. You’re setting the second rock layer, turning the spotlight on your focal points. Treat it like arranging furniture in a room, create space for the plants to grow. This way, your layout soars to new heights at different levels for a stunning multi-dimensional appeal.
8. Planting Your Chosen Flora
Now that your stage is all set, it’s time for the grand entrance of the star performers – your plants! Pick that perfect spot in your rock garden and let ’em strut their stuff. Show off their colors, their textures, their unique quirks. Just remember, it’s not a competition, so make sure each one gets their moment in the sun. Let ’em bask in the limelight, they’ve earned it!
9. Finishing Touches and Optional Add-Ons
Almost there, folks! Time for those finishing touches, put a bit of razzle-dazzle into your rock garden. Throw in a layer of mulch around your plants, it’s like welcoming a fresh set of curtains in an old room. Add a little edging around your garden, for that necessary curb appeal. Maybe sneak in a little boulder or two if you’re feeling fancy. Give it your personal touch, it’s your show after all!
Maintaining Your Rock Garden
And just like that, you’ve built yourself a rock garden! But remember, kindness keeps it a beauty. Give it love, and it’ll keep charming everyone. Deep breaths, a little patience, a dash of labor, one smile at a time, that’s the secret ingredient for a show-stopping, eyeball-poping rock garden!
Watering Your Rock Garden
Hydrating your rock garden is like playing favorites with your children; you gotta give each one what they really need. Just because we’re dealing with drought-tolerant or alpine plants doesn’t mean it’s a free-for-all. The flower bed in your rock garden requires careful attention, just like any other green space in your outdoor area. Remember, even the toughest cactus flagman needs a drink every now and then. So, stick a flat surface (like a longboard) across from your hilly rock arrangement and replicate rain by sprinkling water down on it. Let Mother Nature do her thing.
Pruning and Weeding Techniques
So, you’ve managed to build your rock garden, now it’s time to show it some love, just like you would with your Grandma’s vintage rose garden. Pruning and weeding are essential so the flowering plants and dwarf conifers can shine. Pull out invaders with your hands or use a weed tool, being careful not to damage the root ball of your plants. It’s a bit like playing a game of chess with Mother Nature, where you continuously counter her moves to maintain a clean, aesthetic garden.
Fertilization Recommendations
Building a rock garden goes a bit beyond arranging attractive rocks and tossing in a few plants. The right fertilization can feel like striking gold. Adding compost or manure to the existing soil helps improve your soil drainage, while also providing essential nutrients to your plants. This ain’t your grandma’s recipe, but nothing ventured, nothing gained. Think of it as the secret sauce that injects life into the heart of your rock garden.
Wrapping It Up – Your Personal Piece of Paradise
Once you’ve got your rock garden all set up, and after building and fair bit of grunt work, it’s gonna feel like your own personal piece of paradise. It’s not just the cheerful bloom or the whisper of leaves on the wind, it’s a work of art that’s pure you. A beautiful amalgamation of alpine plants, wildlife-friendly flora, and the arrangement of rocks, all nestled together in an attractive setting.
Don’t underestimate the power of a well-tended rock garden. Combing through the stones, tending your buds, calling each out by their fanciful names like a seasoned conductor acknowledging each symphony’s section is a journey worth every sweat-drenched shirt and dirt-caked nail. And in the end, as you sit back and admire your work, remember you’ve created something unique, genuine, and timeless. Something you can be proud to call your own piece of paradise.
I’m John, a “seasoned citizen” and an avid gardener. I live in Minnesota, where our weather and growing conditions can be harsh and challenging. Over the years, I have learned a thing or two about being successful in growing things. I have curated these tips, which I think are helpful for the beginning gardener and the seasoned experts. If you have feedback, let me know in the contact form.